Snap Layouts is a new feature in Windows 11 that enhances window management and multitasking capabilities by providing a variety of predefined window layouts. It enables you to quickly organize open windows into grids, making it easier to work with multiple applications simultaneously.
Here’s how to use Snap Layouts in Windows 11:
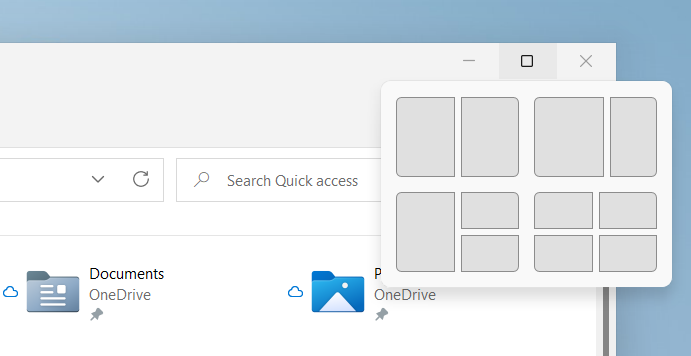
- Hover over the “Maximize” button: Move your cursor over the maximize button (the square icon) in the top-right corner of any open window. You can also press the Windows key + Z to access the Snap Layouts menu for the active window.
- Choose a layout: A small overlay will appear, showing different grid patterns. These patterns represent various window layouts, such as side-by-side, stacked, or corner arrangements. Click on the desired layout for the window.
- Position the window: Once you’ve selected a layout, the window will snap to the corresponding position and size on your screen. Other open windows will be shown as thumbnails in the remaining available spaces within the layout.
- Fill the layout: Click on the thumbnails of other open windows to fill the remaining spaces in the layout. Windows will automatically resize and reposition themselves according to the chosen layout.
- Adjust the layout: You can adjust the size of the windows within the layout by dragging the borders between them. The other windows in the layout will automatically adapt to maintain the grid arrangement.
Snap Layouts also work well with the new Snap Groups and Virtual Desktops features in Windows 11. Snap Groups allow you to switch between groups of applications that you’ve organized using Snap Layouts, while Virtual Desktops enable you to create separate workspaces for different tasks, each with its own Snap Layouts.
Overall, Snap Layouts make it easier to manage and organize open windows, improving productivity and multitasking on Windows 11.